哪吒探针V1版,开启CDN / TLS安装设置和美化教程
Johsnow本教程解决在CDN和Agent 使用 TLS 连接的情况下,不能添加监控端的问题
第一步
- 在cloudflare解析一个域名到安装哪吒面板的服务器。哪吒v1新版只需要一个域名就可以。
例如:
https://nz.51santi.uk
- 生成ssl证书(用cloudflare生成证书,有效期15年)
SSL/TLS –> 源服务器 –> 创建证书 –> 创建

将CERTIFICATE密钥保存为.pem文件后缀, PRIVATE KEY保存为.key文件后缀。
- 上传ssl文件到vps服务器
修改文件权限,==chmod 777 /home/admin/ssl/==
第二步 安装doker和docker-compose
docker安装脚本
1
| bash <(curl -sSL https://cdn.jsdelivr.net/gh/SuperManito/LinuxMirrors@main/DockerInstallation.sh)
|
docker-compose安装脚本
1
| curl -L "https://github.com/docker/compose/releases/latest/download/docker-compose-$(uname -s)-$(uname -m)" -o /usr/local/bin/docker-compose && chmod +x /usr/local/bin/docker-compose
|
第三步 安装nginx和tls
1
| wget -O 1keji_nginxfdnz06.sh "https://pan.1keji.net/f/P9u3/1keji_nginxfdnz06.sh" && chmod +x 1keji_nginxfdnz06.sh && ./1keji_nginxfdnz06.sh
|
- 安装nginx选择1
- 配置反向代理域名证书
- 配置哪吒复杂反向代理
第四步 安装哪吒V1新版本
1
| curl -L https://raw.githubusercontent.com/nezhahq/scripts/refs/heads/main/install.sh -o nezha.sh && chmod +x nezha.sh && sudo ./nezha.sh
|
如果提示需要安装unzip,执行以下代码安装
哪吒探针官方安装文档:https://nezha.wiki/
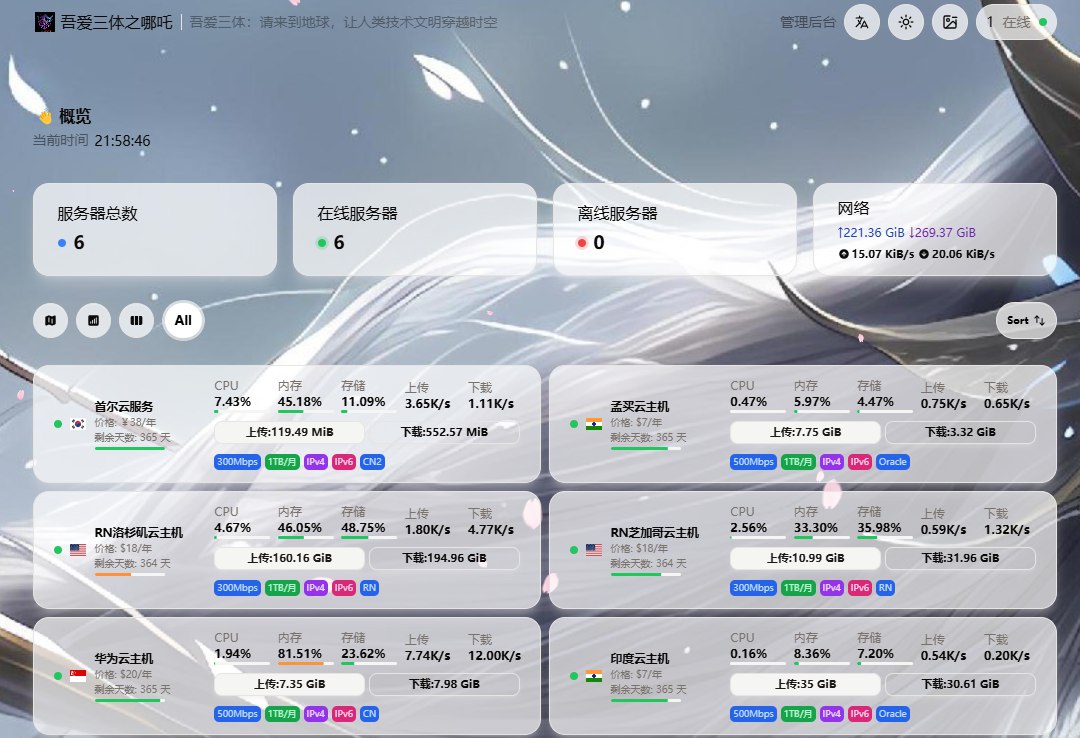
最终预览效果
CDN回源IP:
set_real_ip_from 173.245.48.0/20;
set_real_ip_from 103.21.244.0/22;
set_real_ip_from 103.22.200.0/22;
set_real_ip_from 103.31.4.0/22;
set_real_ip_from 141.101.64.0/18;
set_real_ip_from 108.162.192.0/18;
set_real_ip_from 190.93.240.0/20;
set_real_ip_from 188.114.96.0/20;
set_real_ip_from 197.234.240.0/22;
set_real_ip_from 198.41.128.0/17;
set_real_ip_from 162.158.0.0/15;
set_real_ip_from 104.16.0.0/12;
set_real_ip_from 172.64.0.0/13;
set_real_ip_from 131.0.72.0/22;
real_ip_header CF-Connecting-IP;
关闭哪吒探针远程访问
1
2
3
| cd /opt/nezha/agent/
vi config.yml # 将disable_command_execute设置为true
systemctl restart nezha-agent # 重启
|
卸载哪吒探针Agent
卸载 Agent 包括停止服务、卸载服务,以及删除相关文件。以下是 Ubuntu 系统的卸载步骤:
- 停止并卸载服务:
1
2
| cd /opt/nezha/agent/
./nezha-agent service uninstall
|
- 删除 Agent 文件夹:
1
| rm -rf /opt/nezha/agent/
|
- 查看 Agent 运行日志
在配置文件中启用 debug 模式,使用以下命令查看 Agent 的运行状态和日志:1
| systemctl status nezha-agent*
|
美化脚本
1
2
3
4
5
6
7
8
9
10
11
12
13
14
15
16
17
18
19
20
21
22
23
24
25
26
27
28
29
30
31
32
33
34
35
36
37
| <script>
window.CustomBackgroundImage="https://pic.51santi.uk/api/cfile/AgACAgUAAyEGAASQGKXDAANNZ9anlbQKBuz-NSHt9aEjKc2KlKgAAorAMRu8ArhWY3Z1iSbxV-8BAAMCAAN3AAM2BA";
window.CustomLogo = "https://img.028029.xyz/1734533172211.png";
window.ShowNetTransfer = "true";
window.CustomIllustration = "https://img.003666.xyz/2025/01/01/6775545511417.webp";
window.CustomDesc ="吾爱三体:请来到地球,让人类技术文明穿越时空";
var observer = new MutationObserver(function(mutationsList, observer) {
var xpath = "/html/body/div/div/main/div[2]/section[1]/div[4]/div";
var container = document.evaluate(xpath, document, null, XPathResult.FIRST_ORDERED_NODE_TYPE, null).singleNodeValue;
if (container) {
observer.disconnect();
var existingImg = container.querySelector("img");
if (existingImg) {
container.removeChild(existingImg);
}
var imgElement = document.createElement("img");
imgElement.src = "https://img.003666.xyz/2025/01/01/6775545511417.webp";
imgElement.style.position = "absolute";
imgElement.style.right = "-66px";
imgElement.style.top = "-145px";
imgElement.style.zIndex = "10";
imgElement.style.width = "160px";
container.appendChild(imgElement);
}
});
var config = { childList: true, subtree: true };
observer.observe(document.body, config);
</script>
<script src="https://cdn.jsdelivr.net/gh/mocchen/cssmeihua/js/aixin.js"></script> <!-- 点击爱心特效 -->
<script src="https://cdn.jsdelivr.net/gh/mocchen/cssmeihua/js/yinghua.js"></script> <!-- 页面樱花效果 -->
<span class="js-cursor-container"></span>
<script src="https://fastly.jsdelivr.net/gh/stevenjoezhang/live2d-widget@latest/autoload.js"></script>
<script src="https://cdn.jsdelivr.net/gh/mocchen/cssmeihua/js/xiaoxingxing.js"></script>
|
编辑服务器->公开备注
根据https://nezhainfojson.pages.dev/ 配置的json粘贴进去
[up主专用,视频内嵌代码贴在这]